Box2D C++ tutorials - Setting up (Windows)
Last edited: July 14 2013Building the testbed (Windows)
Let's look at the process of setting up the default 'testbed' which is part of the Box2d source code base. The testbed is a very useful tool which contains examples of various features which you can interact with using the mouse, adjust parameters, pause and step the simulation etc.
Here I am installing on WindowsXP, using the free IDE Code::Blocks and the free c++ compiler MinGW.
The simplest way to build the Box2D library is to use the Code::Blocks project file which is included in the source code download. You can get Code::Blocks and the MinGW compiler together in one easy to install package from here. The first time you use Code::Blocks you will need to confirm that you are using the GNU gcc compiler.
Download the Box2D source code archive from here and unzip it. In the Contributions/Platforms/CodeBlocks folder, you will find a file called Box2D.workspace which can be opened with Code::Blocks. Unfortunately in the download file, the project files seem to be out of sync and the filepaths were not matching with the folder structure of the rest of the source. I fixed the project files so that the paths match, you can download them here. Please use these to replace the .workspace and .cbp files in the Codeblocks folder.
Box2D v2.1.2 Code::blocks project files
* Update: Box2D v2.2.0 has been released.
The tutorials on this site are using v2.1.2 but I will put the v2.2.0 project files here for those who might be looking for them.
Box2D v2.2.0 Code::blocks project files
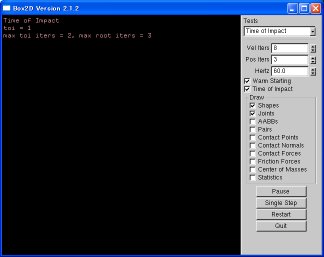
Open the Box2D.workspace file with Code::Blocks and select 'Build and run' from the main menu. If everything works out you should see the testbed window showing like this:
 Select from the drop-down list in the top right to try out the tests
that are currently in the testbed. We will be adding our own items into
this list later on.
Select from the drop-down list in the top right to try out the tests
that are currently in the testbed. We will be adding our own items into
this list later on.Testbed features
Apart from the obvious features visible in the right hand control panel, the testbed also allows you to:
- Move the view around - arrow keys or drag with right mouse button
- Zoom the view - z,x keys
- Grab objects in the scene - left mouse button
- Launch a bullet into the scene from a random location - space bar
- Launch a bullet into the scene - drag left mouse button while holding shift, then let go


