


Box2D C++ tutorials - Setting up (iPhone)
Last edited: July 14 2013Chinese version -> 中文
Intro
This article looks at how to set up a basic project for the iOS using Box2D and OpenGL. Since it does not use the testbed like the rest of the 'Setting up' topics, I have kept it separate from the tutorial pages, but it could be useful for you if you are in the situation I was 6 months ago, which is:
- you want to make physics games using Box2D for the iOS
- you know C++ well but can't be bothered learning much Obj-C
- you know OpenGL and want to use it for your games
- you prefer to reuse your own code rather than learning libraries such as cocos2d
- you've never used XCode (or Mac either for that matter)
The project will use OpenGL ES 1.1 only, and is made with XCode 3.2.4. and Box2D 2.1.2.
Setting up a project with Box2D support
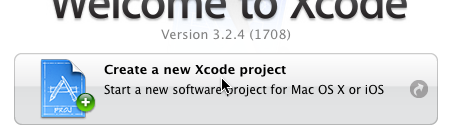
Open XCode and create a new project, choosing "OpenGL ES Application".
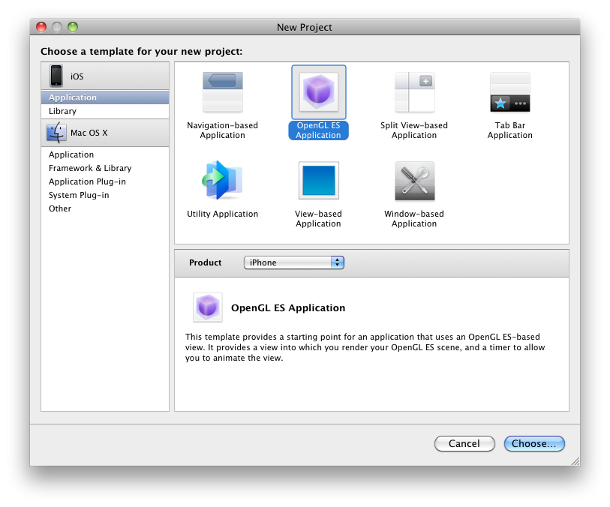
This project sets up a basic OpenGL view and a timer to use for animation.
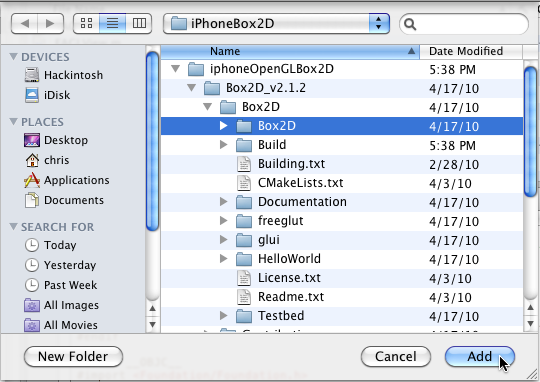
Download the Box2D source code from here (v2.1.2), unzip it and place it alongside the existing project source files, or anywhere convenient.
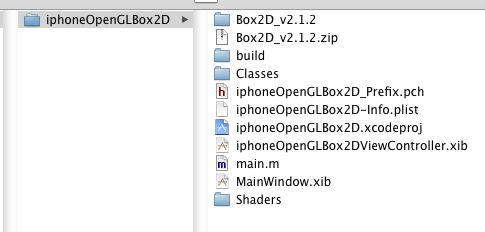
Add the Box2D engine part of the source code tree to the project.
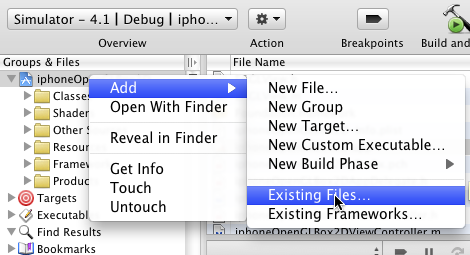
Specifically, the engine part of the source code is the folder which contains Box2D.h
It's convenient to create groups recursively for the added files.
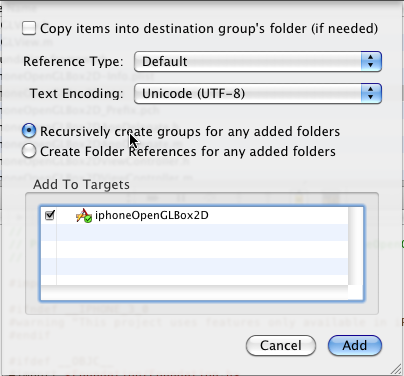
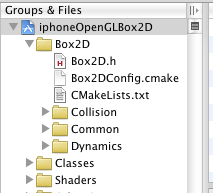
After adding, the source can be easily browsed in the project files. (The cmake files are not necessary, you can remove those.)
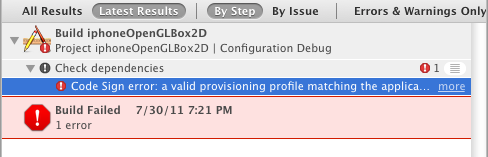
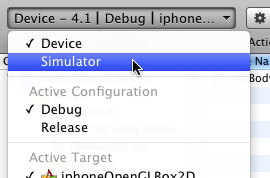
Try building the project. If you get an error saying that a valid provisioning profile could not be found, you can get one from the provisioning portal at Apple's iOS Dev Center, but I'm not gonna cover that here so just change the build type to Simulator to continue.
ah... first attempt at building results in thousands of errors due to the Box2D headers not being found.

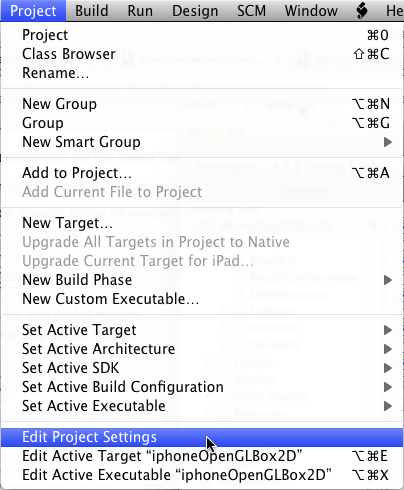
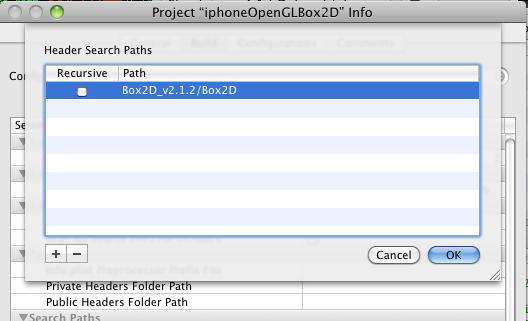
In the project settings...
...double click 'Header Search Paths' (type 'header' in the search field to filter the settings to make it easier to find).
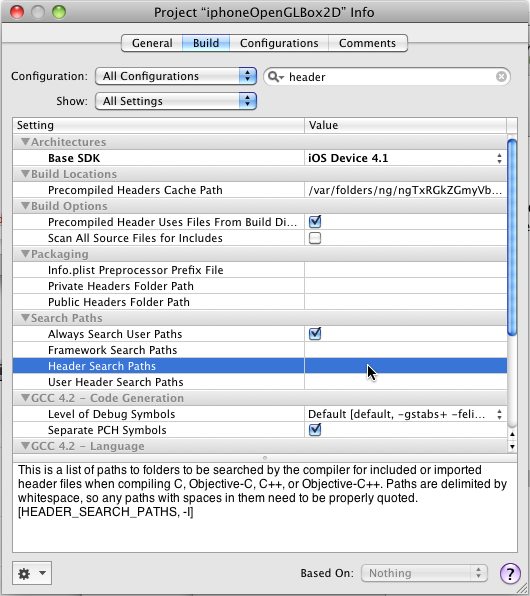
Specify one folder above where the file Box2D.h is. The reason for this is because the Box2D files are intended to be included like this:
#include <Box2D/Box2d.h>
Building should succeed now.
Adding a Box2D world to the OpenGL view
Take a look at the following functions in the <projectname>ViewController.m file:
- -(void) awakeFromNib
- -(void) drawFrame
- -(void) viewDidUnload
This function is called once when the view is loaded. Any initialization which only needs to be done once can be put here. Currently this function creates the OpenGL context and animation timer.
drawFrame
This function is called repeatedly to update the view while it is running. The refresh rate can be adjusted in the startAnimation function. This function is called as part of a run loop so it is not called from another thread and you don't need to worry about concurrency issues.
viewDidUnload
This is called when the view is closed, which in this default project is never. However if you have a more complex app where you are loading and unloading views you will need to free any resources you are using in this function. Currently it just tears down the OpenGL context.
Now take a look at the header file <projectname>ViewController.h
This class holds the OpenGL context and a few other things as member variables. Include the Box2D header and add a Box2D world pointer as a class member variable:
1 2 3 4 | #include <Box2D/Box2d.h> //inside the class declaration (the @interface part) b2World* m_world; |
That will again cause masses of errors because we are trying to put C++ in an Obj-C file and that doesn't go down very well. However this is all magically taken care of by changing the file extension for the .m file to .mm - if you do this in XCode's Groups & Files panel it conveniently(??) changes the name of the file on disk as well. You will also need to change the file extension of the <projectname>AppDelegate.m file too, because it includes the view controller header. The .mm extension means the file is taken to be mixed C/C++/Obj-C and makes life much easier.
Now in the awakeFromNib function we can create a Box2D world:
1 | m_world = new b2World( b2Vec2(0,-10), true ); |
1 | delete m_world; |
Making a debug draw class to render the Box2D world
Since I have no clue about how OpenGL ES 2.0 works, I will be forcing the app not to use it for the purposes of this article. I usually do that by altering the beginning of the awakeFromNib function so that instead of first attempting to create a 2.0 context, it simply creates a 1.1 context right away:
1 | EAGLContext aContext = [[EAGLContext alloc] initWithAPI:kEAGLRenderingAPIOpenGLES1]; |
Replace the contents of the drawFrame function with a bare-bones implementation like this:
1 2 3 4 5 6 7 8 9 10 11 12 13 14 | [(EAGLView *)self.view setFramebuffer]; glClearColor(0, 0, 0, 1); glClear(GL_COLOR_BUFFER_BIT); glMatrixMode(GL_PROJECTION); glLoadIdentity(); glMatrixMode(GL_MODELVIEW); glLoadIdentity(); m_world->Step(1/60.0f, 8, 3); m_world->DrawDebugData(); [(EAGLView *)self.view presentFramebuffer]; |
For details on how this works see the debug draw tutorial topic, but suffice to say you'll need something like this for each of the functions in b2DebugDraw:
1 2 3 4 5 6 7 8 9 10 11 12 13 14 15 16 17 18 19 20 21 22 23 24 | void DrawSolidPolygon(const b2Vec2* vertices, int32 vertexCount, const b2Color& color) { //set up vertex array GLfloat glverts[16]; //allow for polygons up to 8 vertices glVertexPointer(2, GL_FLOAT, 0, glverts); //tell OpenGL where to find vertices glEnableClientState(GL_VERTEX_ARRAY); //use vertices in subsequent calls to glDrawArrays //fill in vertex positions as directed by Box2D for (int i = 0; i < vertexCount; i++) { glverts[i*2] = vertices[i].x; glverts[i*2+1] = vertices[i].y; } glEnable(GL_BLEND); glBlendFunc (GL_SRC_ALPHA, GL_ONE_MINUS_SRC_ALPHA); //draw solid area glColor4f( color.r, color.g, color.b, 0.5f ); glDrawArrays(GL_TRIANGLE_FAN, 0, vertexCount); //draw lines glColor4f( color.r, color.g, color.b, 1 ); glDrawArrays(GL_LINE_LOOP, 0, vertexCount); } |
Finishing off the loose ends
Now that we have a debug draw class to use, in the view controller header we can add:
1 2 3 4 | #include "MyDebugDraw.h" //inside the class declaration (the @interface part) MyDebugDraw m_debugDraw; |
1 2 | m_debugDraw.SetFlags( b2DebugDraw::e_shapeBit ); m_world->SetDebugDraw( &m_debugDraw ); |
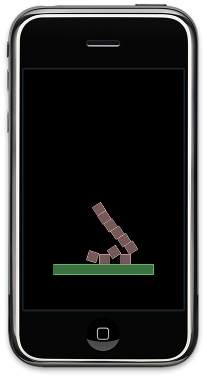
aaaargghhh still just a black screen! Well, the world is empty right? Let's put some bodies in it (there is nothing special about this section, add anything you like here just to have something to look at):
1 2 3 4 5 6 7 8 9 10 11 12 13 14 15 16 17 18 19 20 21 22 23 24 25 26 27 28 29 30 | //in awakeFromNib after creating world { //body definition b2BodyDef myBodyDef; myBodyDef.type = b2_dynamicBody; //shape definition b2PolygonShape polygonShape; polygonShape.SetAsBox(1, 1); //a 2x2 rectangle //fixture definition b2FixtureDef myFixtureDef; myFixtureDef.shape = &polygonShape; myFixtureDef.density = 1; //create dynamic bodies for (int i = 0; i < 10; i++) { myBodyDef.position.Set(0, 10); m_world->CreateBody(&myBodyDef)->CreateFixture(&myFixtureDef); } //a static body myBodyDef.type = b2_staticBody; myBodyDef.position.Set(0, 0); b2Body* staticBody = m_world->CreateBody(&myBodyDef); //add a fixture to the static body polygonShape.SetAsBox( 10, 1, b2Vec2(0, 0), 0); staticBody->CreateFixture(&myFixtureDef); } |
1 2 | glViewport(0, 0, 320, 480); glOrthof(-16, 16, -8, 40, -1, 1); |
Source code
You can download the source code for this XCode project here.